
I can’t be the only one to think that the default OneDrive path that includes the “OneDrive – CompanyName” is unnecessary long. I saw that a new policy was recently added at the bottom of the list in this article on Microsoft Learn called CustomSyncRootFolderName. While it is not available natively in Intune, I had to try and do a little custom ADMX magic to see if I could get this to work via Intune (hint; it did work!).
What this policy actually does
This is how this policy is described in the Microsoft Learn article 👇
“This setting lets you customize the local OneDrive sync root folder name on users’ computers. By default, the folder name is OneDrive – {organization name}. Shortening this name increases the available path length for nested folders and files.”
Some limitations to know about
This is also straight from the Microsoft Learn article 👇
- You must provide at least one character for the custom folder name.
- The custom folder name cannot be “OneDrive”.
- The full OneDrive sync root folder path (for example, C:\Users{alias}\OneDrive – {organization name}) cannot exceed 120 characters.
- Custom folder names cannot contain characters that are invalid for Windows folders. For a list of unsupported characters, see Invalid characters.
Another important note is how to handle this for current and new users 👇
- New users will get the custom name automatically
- Users who are already syncing their OneDrive will need to
Unlink their account > restart the computer > then relink the account to OneDrive.
Why is this useful?
I can see numerous reason why you would want to deploy this for your customers and below are some I could think of:
- If a user has long file paths in OneDrive this could be a way to shorten it down and save some characters.
- Some might just think it looks better to set a custom path
- Easier for scripting since we can avoid blank spaces in the path
- Easier when navigating in CLI tools
- Multi-tenant companies might want to remove the “OneDrive – ” at the start and just have the OneDrive labeled as CompanyA, CompanyB, Company C and so on to make it easier for users to navigate.
Prerequisites for this to work
We need the following files uploaded in Devices > Configuration > Import ADMX in Intune
- Windows.admx and Windows.adml
- OneDrive.admx and OneDrive.adml
If you don’t have these files uploaded I’ll show you how to get them in the next two steps.
If necessary; getting the Windows.admx and Windows.adml
You’ll find these files on any Windows 11 computer.
Windows.admx is located in C:\Windows\PolicyDefinitions. Locate the file there and copy it to a separate folder.
Windows.adml is located in C:\Windows\PolicyDefinitions\en-US. Locate the file there and copy it to the same folder as your Windows.admx.
Getting the OneDrive.admx and OneDrive.adml
Locate a computer where OneDrive is installed. The path you are looking for is Microsoft\OneDrive\BuildNumber\adm and it can be located in one of the following paths (depending on your OS architecture)
- %LocalAppData%
- Program Files
- Program Files (x86)
To view your OneDrive build you can go to Settings > About in your OneDrive client 👇
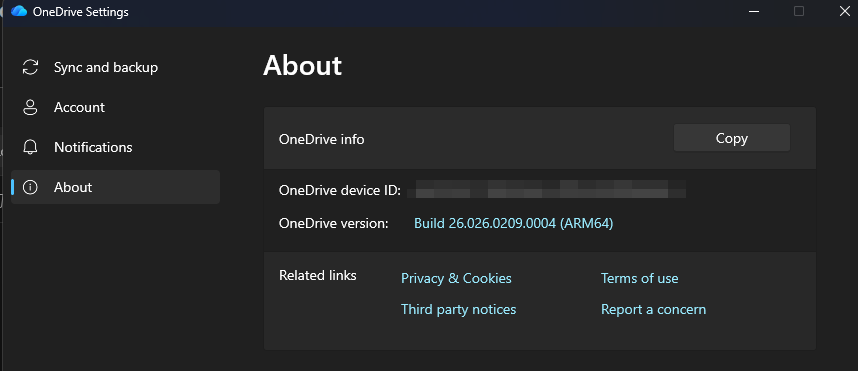
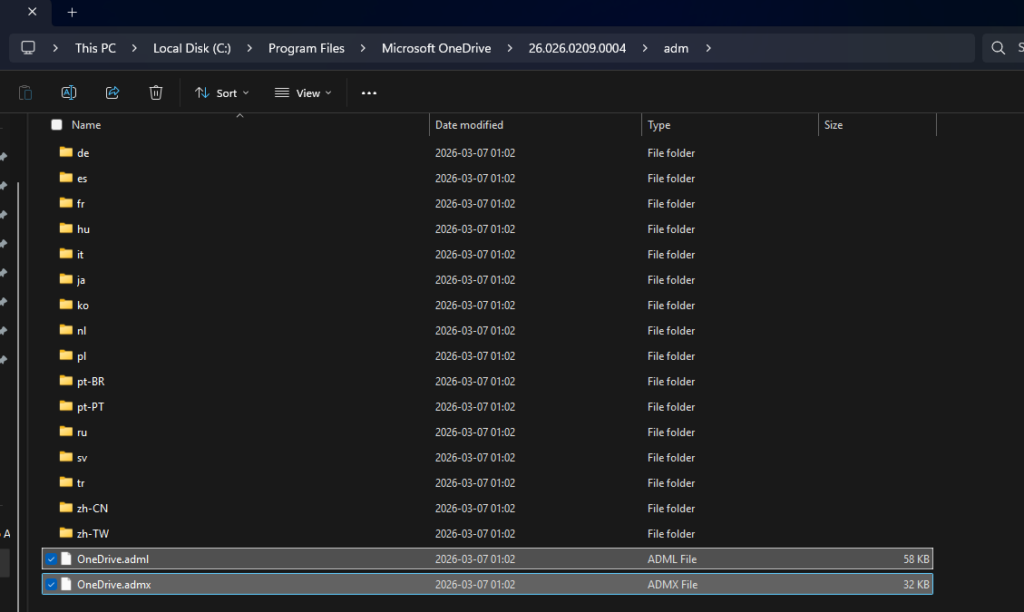
For example my files were located under C:\Program Files\Microsoft OneDrive\26.026.0209.0004\adm as you can see below. Try all the paths above until you find them. Copy those two files to the same folder as your Windows.admx and Windows.adml👇
Uploading the files to Intune
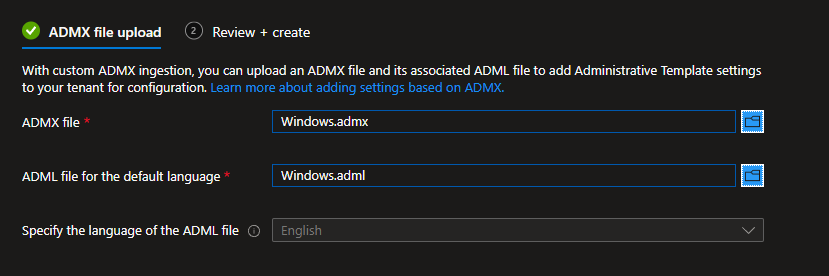
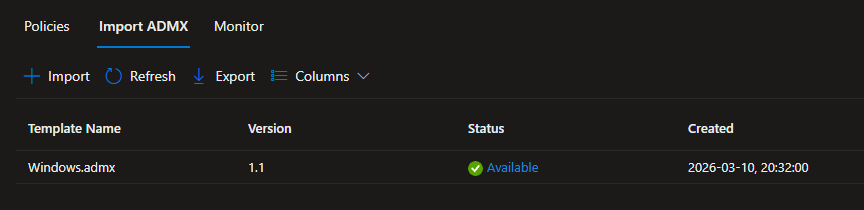
Go to Intune > Devices > Configuration > Import ADMX and upload your Windows.admx and Windows.adml first.
Hit Next > Create
Wait for the status to go from “Upload in progress” to “Available”
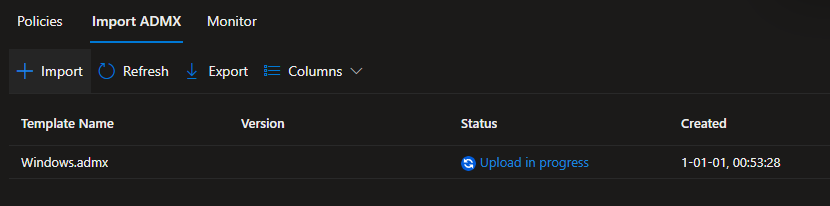
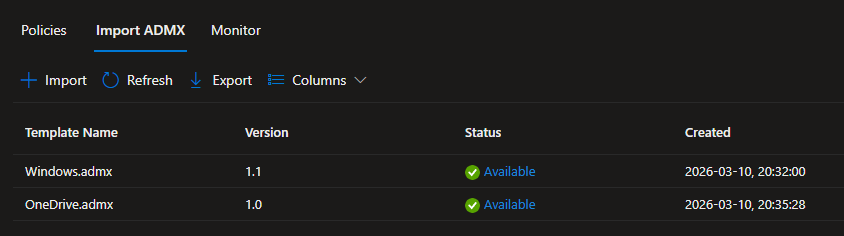
Once the status turns to “Available” on the Windows.admx you can upload the OneDrive.admx and OneDrive.adml in the same way and wait for that to turn “Available” as well. When you are done it should look like below👇
Creating the policy
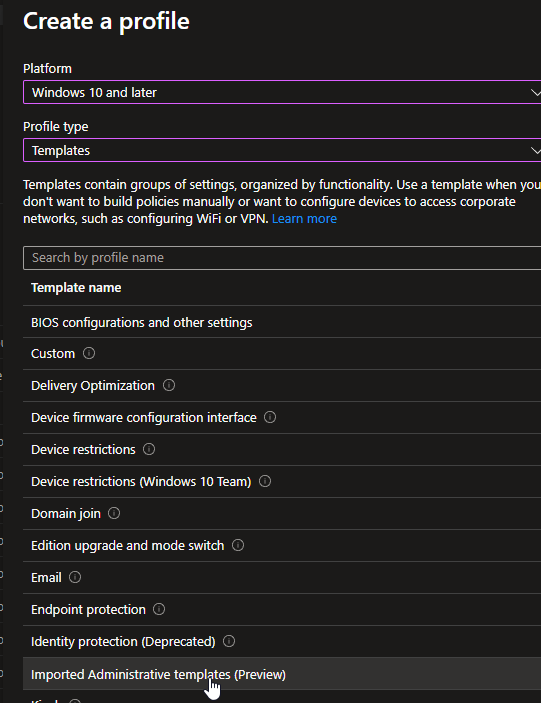
Go to Devices > Configuration > Create > Platform: Windows 10 and later > Profile Type: Templates > Imported Administrative templates (preview). Don’t worry about it being in preview, it’s been forever and usually works just fine!👇
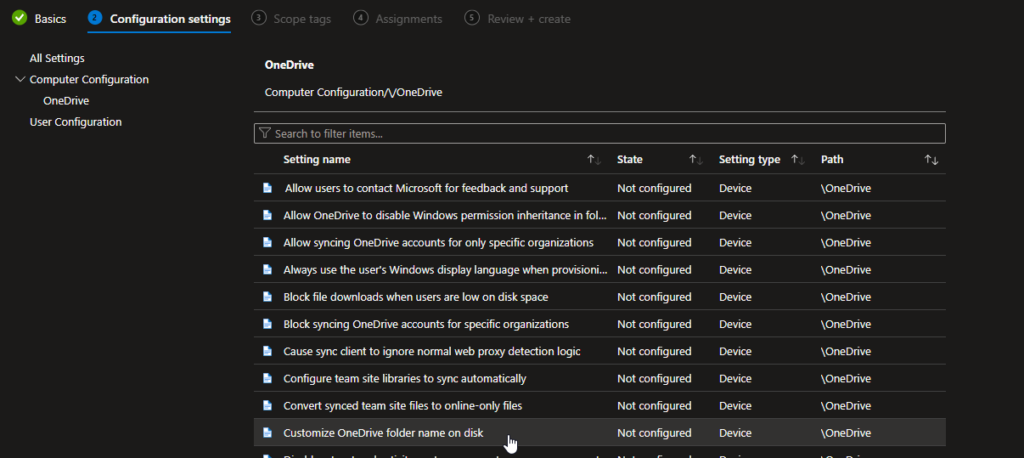
Give the policy a name and when you get to Configuration settings locate Computer Configuration > OneDrive > Customize OneDrive folder name on disk.👇
Set it to “Enabled” and enter your tenant ID in the Name field and the custom folder name in “Value” like below👇
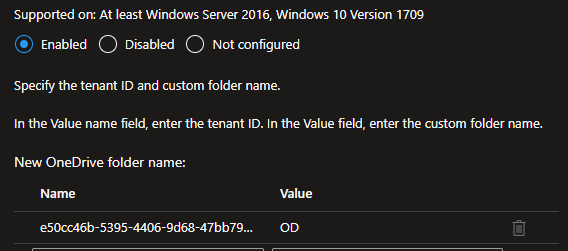
Deploy it to a user or device group and then you are done!
Final result
Before we had the looong path:

After this policy applies we have a short and much cleaner path:

That’s all for today! This was a really fun one to try out and document here on the blog. Feel free to subscribe to my newsletter to get notified whenever I post. It truly means a lot to me seeing your support. Until next time!
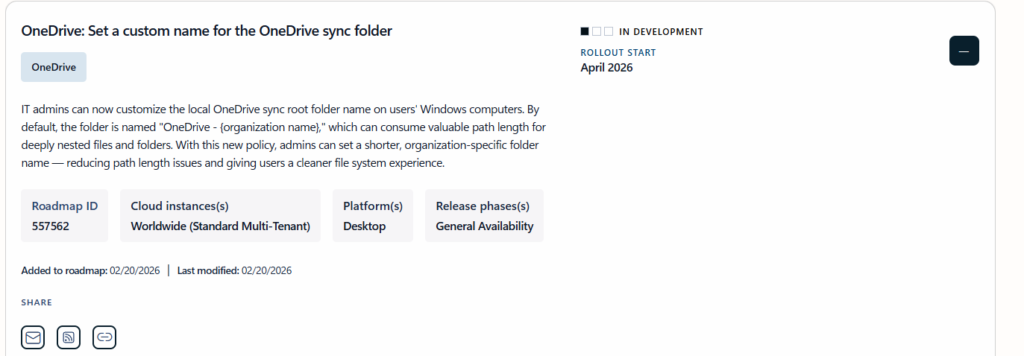
Update; Official Rollout Start in April 2026 for this feature!
As of writing this post, this is the current status of this new feature referenced as “OneDrive: Set a custom name for the OneDrive sync folder” in the M365 Roadmap. Read more about it here!
Leave a Reply